

What Causes Sciatica Pain in Leg and Foot? A 2026 Guide
What causes sciatica pain in leg and foot? Learn about nerve root compression, herniated disks, and when to see a doctor. Find relief and start recovery.
Read More →
Last Updated: September 22, 2026
Learning how to adjust office chair for posture takes about 15 minutes. This guide walks you through seven steps. (Source: Occupational Safety and Health Administration's computer workstation guidance)
Clear your workspace and gather a few basics:
Seat height comes first because every other setting depends on it. Set your seat so your elbows rest near desk height and your hips sit level with, or slightly above, your knees.
Here's how to check it:
Seat depth decides how your weight spreads across your thighs. The goal is a two-to-three finger gap between the back of your knee and the front edge of the seat, the popliteal space. Too much depth rounds your lower back; too little concentrates pressure under your thighs.
To set it:
Office chair lumbar support adjustment is the step most people skip, and it matters most for musculoskeletal health. The pad should press into the natural inward curve of your lower back, not your mid-back.
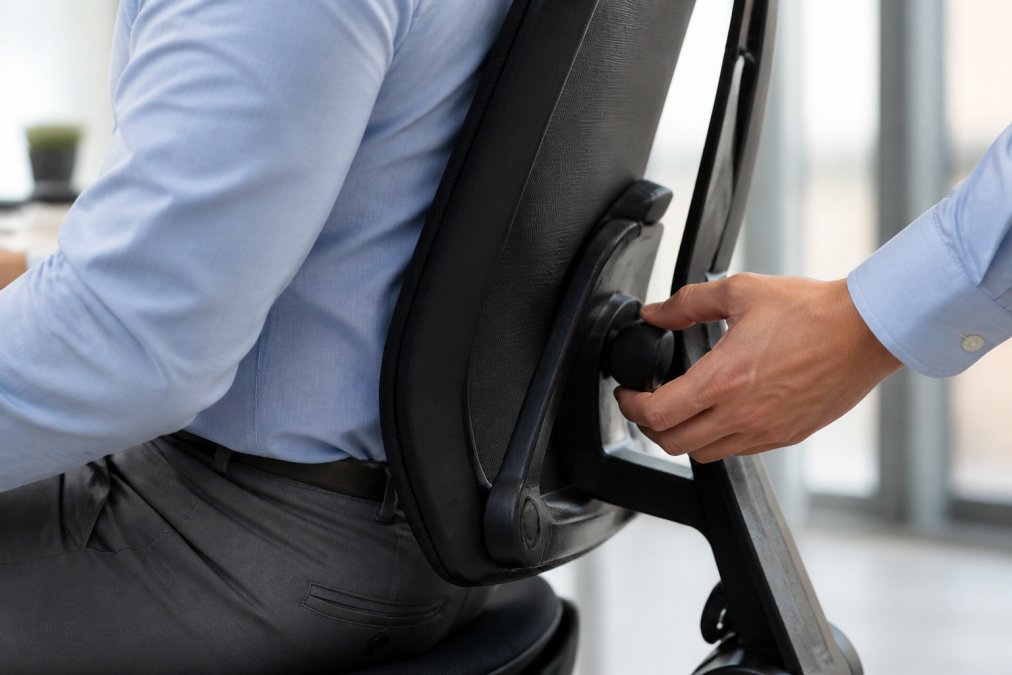
Set it like this:
Armrests should support your forearms without lifting your shoulders. Set them so your elbows rest at roughly 90 degrees and your shoulders drop away from your ears. If your shoulders rise, they're too high; if you lean forward to reach the desk, they're too low.
A locked, upright backrest feels correct and usually isn't. A slight recline, around 100 to 110 degrees, takes load off the discs in your lower back by shifting pressure to the backrest itself. Backrest tilt and tension control work as a pair: tilt sets the angle, tension sets how much force it takes to lean back into it.
| Setting | What It Does | Starting Point |
|---|---|---|
| Backrest angle | Sets how far you recline | 100-110 degrees |
| Tilt tension | Sets resistance to leaning | Firm enough to hold you |
| Tilt lock | Freezes the angle | Unlock for daily work |
Inside most chairs, a coiled spring or torsion bar resists the backward push of the backrest. Turning the tension knob clockwise compresses the spring and increases resistance; counterclockwise releases it. Correct tension depends on your body weight, a 130-pound user and a 220-pound user need different settings on the same chair. If the backrest slams back when you lean, it's too loose; if you must push hard with your shoulders, it's too tight.
Here's the calibration method:
Tilt lock freezes the recline angle. Use it for focused tasks like typing or reading dense material, and unlock it for meetings, phone calls, and any task where you'd naturally shift position. Leaving it locked all day converts a dynamic chair into a static one. (Source: National Institute for Occupational Safety and Health (NIOSH) research on musculoskeletal disorders)
Heavier users often max out the tension knob and still find the recline too soft, a sign the chair's spring rate is mismatched to your weight, not that you're using it wrong. Lock the tilt at a fixed recline angle and skip the dynamic recline. Lighter users hit the opposite problem: even the loosest tension feels stiff, so lock the tilt slightly reclined and use a lumbar cushion.
Your feet belong flat on the floor. If they don't reach, use a footrest rather than tucking them under the chair.
Check your desk height at the same time:
Headrests are for resting, not constant contact. Set yours so it touches the base of your skull when you lean back and stays clear when you sit upright. Cervical alignment depends on where your screen sits: set your monitor so the top of the screen sits at or just below monitor eye level.
Most office chairs lack lumbar depth control, tilt tension, or an adjustable seat pan; kitchen chairs, folding chairs, and entry-level task chairs have none of them. That doesn't mean bad posture is inevitable, it means substituting movement and props for the adjustments the chair can't make.
Here's how to work with what you have:
| Missing Feature | Workaround | What It Fixes |
|---|---|---|
| No lumbar depth | Rolled towel or lumbar cushion | Lower back curve |
| No seat depth | Cushion behind your hips | Thigh pressure |
| No armrests | Desk-level wrist rest | Shoulder tension |
| Fixed height | Footrest or seat cushion | Knee angle |
| No headrest | Raise the monitor | Neck strain |
| No tilt tension | Sit forward on the seat pan | Static loading |
Static posture is outdated advice. No single position, however perfect, is good for eight hours. Cycle through several supported positions so no tissue stays loaded for too long.
On a basic chair, you can still do this:
Standard chairs are built for a narrow band of body sizes, roughly 5'4" to 6'0". Outside that range, the workarounds change.
If you're under about 5'2":
If you're over about 6'2":
If you've adjusted everything, added the props, and cycled your positions, and pain still builds by mid-afternoon, the chair may not be the whole story. A workstation assessment, monitor riser, or keyboard tray can fix issues the chair can't reach. If symptoms persist past two weeks of consistent changes, a qualified professional can assess the cause.
Run through this list whenever your back starts talking to you:
The 90-90-90 rule means your hips, knees, and elbows should each rest at roughly a 90-degree angle. Set your seat height so your thighs are parallel to the floor, then adjust armrests so your elbows bend at 90 degrees. This neutral posture reduces strain on the lumbar spine and forearms. If your chair lacks a seat-depth slider, use a cushion to bridge the gap behind your knees.
Your lumbar support should press into the natural inward curve of your lower back, roughly at belt height or slightly above. If you feel pressure on your tailbone or shoulder blades instead, the pad is too low or too high. Adjust it so your pelvis tilts slightly forward and your thoracic spine stays upright. A correct office chair lumbar support adjustment should feel supportive, not forceful.
Feet should rest flat on the floor with your knees at the same height as your hips, creating a 90-degree angle at the knee. If your chair is too high, use a footrest rather than dangling your legs, which can cut off circulation. Keep a small gap, about two fingers wide, between the back of your knees and the edge of the seat pan to avoid pressure on the popliteal space.
Slouching usually means your backrest tilt is too loose or your lumbar support is missing. Tighten the tension control so the backrest holds you upright without pushing you forward, and set the tilt to 100-110 degrees rather than a full recline. Then practice dynamic sitting: shift your weight every 20-30 minutes and use micro-movements to keep your spinal curvature active instead of static.
Chronic back and neck pain rarely traces back to one cause, and a well-adjusted chair is only part of the picture. At chiropracticcare.clinic, we help adults understand what's driving their discomfort before deciding on next steps. Our team offers posture and movement assessments, practical guidance on workstation setup, and care plans built around your daily routine. Get started with chiropracticcare.clinic and find out what's actually causing your pain.


